
Settings > Global Theme
Presenter overlay for Windows
Every default shortcut is Ctrl + Alt + <letter> and can be changed from the tray menu's Hotkeys item. This page is meant to be printed or kept open on a second screen.
| Shortcut | Action |
|---|---|
| Ctrl+Alt+H | Halo rings |
| Ctrl+Alt+Y | Halo glow |
| Ctrl+Alt+S | Spotlight |
| Ctrl+Alt+Shift+W | Window spotlight |
| Ctrl+Alt+X | Focus/Blur |
| Ctrl+Alt+Shift+B | Blackout screen |
| Ctrl+Alt+A | Pointer trail |
| Ctrl+Alt+R | Click ripples |
| Ctrl+Alt+O | Scroll ripples |
| Ctrl+Alt+T | Mouse strokes |
| Ctrl+Alt+K | Keystrokes |
| Ctrl+Alt+Shift+P | Cursor position |
| Ctrl+Alt+M | Magnifier |
| Ctrl+Alt+Shift+M | Lock magnifier |
| Ctrl+Alt+Shift+L | Mic meter |
| Ctrl+Alt+Shift+X | Volume mixer |
| Ctrl+Alt+L | Laser pointer |
| Ctrl+Alt+P | Custom pointer |
| Shortcut | Action |
|---|---|
| Ctrl+Alt+W | Webcam |
| Ctrl+Alt+Shift+Y | Media display |
| Ctrl+Alt+Shift+C | Clock |
| Ctrl+Alt+D | Drawing mode |
| Ctrl+Alt+Shift+D | Show / hide drawing toolbar |
| Ctrl+Alt+U | Undo last drawing |
| Ctrl+Alt+C | Clear drawings |
| Ctrl+Alt+J | Save screenshot |
| Ctrl+Alt+V | Start / Stop recording |
| Ctrl+Alt+Z | Pause / Resume recording |
| Ctrl+Alt+Shift+V | Start / Stop voice recording |
| Ctrl+Alt+Shift+Z | Pause / Resume voice recording |
| Ctrl+Alt+B | Start countdown timer |
| Ctrl+Alt+F | Pause countdown timer |
| Ctrl+Alt+Shift+T | Start / Stop stopwatch |
| Ctrl+Alt+Shift+F | Pause / Resume stopwatch |
| Ctrl+Alt+Shift+R | Reset stopwatch |
| Ctrl+Alt+Q | Quick help |
| Ctrl+Alt+I | Show / hide desktop icons |
| Ctrl+Alt+N | Show / hide taskbar |
| Ctrl+Alt+E | Show / hide toolbar |
| Ctrl+Alt+Shift+S | Open Settings |
| Left-click tray icon | Hide / show all visual aids |
| Shift+click a tray menu item | Jump to that tool's Settings page instead of toggling it |
| Inside Drawing mode only | |
| Esc | Exit drawing mode |
Ctrl+Alt+1 through Ctrl+Alt+9, then Ctrl+Alt+0 for a 10th, instantly switch to that numbered profile in the tray menu's Profiles list. See Profiles.
| Key | Shape | Modifiers |
|---|---|---|
| L | Straight line | — |
| R | Rectangle | +Shift filled, +Ctrl rounded corners |
| C | Circle / oval | +Shift filled |
| A | Arrow | +Shift double-headed |
| P | Polygon | click corners; release, Enter, right-click, or 1st corner to close |
| H | Highlighter | thick, translucent |
| N | Numbered marker | click to stamp |
| T | Text | click to type in a popup, then place |
| M | Move existing shape | hold + drag a shape |
| B | Cycle background | desktop → colour 1 → colour 2 |
| Ctrl+Z | Undo last stroke | — |
| F1 | Show/hide this key list on screen | — |
| Right mouse button | Erase drawings under pointer | — |
| Mouse wheel | Line thickness | — |
| Ctrl + Mouse wheel | Cycle drawing colour | — |
All shape keys are individually configurable in Settings > Drawing mode, and PointCue prevents assigning the same key to two tools.
PointCue runs from the Windows system tray (the icon group near the clock). Click the tray icon to open the menu and turn tools on or off; each toggle shows a checkmark when active. Right-click behaviour is the same as left-click for opening the menu — the special case is a plain left-click, which instantly hides every enabled visual pointer aid (see Tray menu & pause-all), letting you quickly clear the screen without hunting through the menu.
Open Settings from the tray menu to adjust any tool — sizes, colours, opacity, position, and shortcuts. The settings window lists every tool in a tree on the left, grouped by what it does; changes apply instantly so you can see the effect on your screen as you adjust. A Standard / Pro toggle above the profile bar switches every page between just the commonly-used options (Standard) and every option, including fine shape/colour/thickness tuning (Pro) — remembered across restarts, independent of any profile.
Open Hotkeys from the tray menu to remap any shortcut; every shortcut requires at least one modifier (Ctrl, Alt, and/or Shift), and PointCue blocks assigning the same combination to two different actions. Its own "Reset to defaults" button restores every shortcut to its original key in one click, separate from the main Settings window's Factory reset.
Global Theme is a shared palette of up to 10 colours plus a shared shape/opacity/thickness that other tools can optionally follow, so the whole overlay looks coordinated without recolouring each tool by hand. A growing set of curated presets is available (Amber, Autumn, Blue, Candy, Chartreuse, Classic, Cool, Cyberpunk, Desert, Earth, Forest, Grayscale, Green, High Contrast, Indigo, and more, applying to colours 1–5), a colour wheel for one-click monochromatic shading across all 10 colours, or set each colour yourself.
Every tool that supports a "Match Halo" / "Same as Halo" / "Match Global Theme" style toggle switch will follow the shared theme automatically until switched off, at which point it reverts to its own independent settings.
Almost every one of these colour toggles (Pointer trail colour/spark/colour-shift target, Click ripples' and Mouse strokes' Left/Right/Middle/Scroll colours, Laser pointer, Custom pointer, Spotlight frame, Window spotlight frame, Magnifier border, Keystroke border, Countdown timer border, and Webcam border) also shows a "Theme colour" dropdown next to it, so you can choose which of the 10 that slot follows instead of always defaulting to theme colour 1 — letting a fully-matched set of tools spread across the palette instead of repeating a single colour everywhere. Halo's own colour and glow are the shared reference point the palette is built from, so they stay tied to theme colour 1 rather than offering the same dropdown.
A coloured ring around the mouse pointer. Configurable size, ring opacity, colour, and shape (circle or polygon), plus an optional outer glow (its own independent colour) fading outward from the ring.
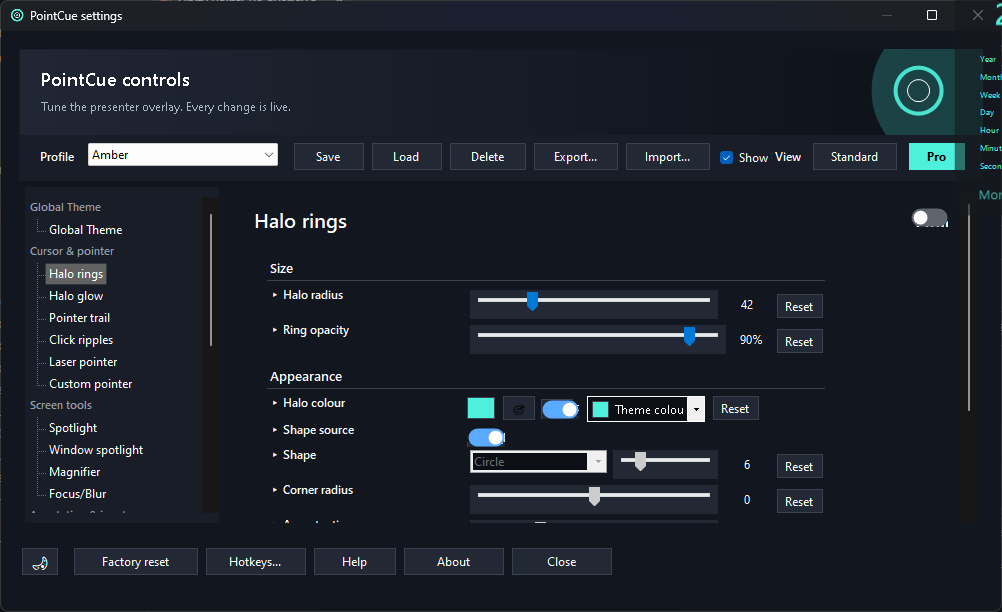
A soft glow layered near the centre and outer edge of the halo, with its own colour and inner/outer opacity — can match the halo's colour automatically or be set independently.
A fading motion path behind the cursor. Choose thickness, 1–12 parallel strands, colour, opacity, and one of 12 styles: Smooth, Sparks, Dashes, Dots, Arrows, Waves, Zigzag, Comet, Neon, Bubbles, Stars, Confetti.
With 2+ strands, a stagger amount and pattern (Sequential/Alternating/Random) control how spread out each strand's markers are, so they don't all land at the same point along the trail, and a strand lead setting can pull the outer strands back behind the centre one(s) for a chevron/flock shape instead of every strand reaching the cursor together. A Smoothness setting softens jitter from natural hand tremor for a cleaner curve, at any style or strand count — it's corner-protected, so a genuine sharp direction change in the cursor's path keeps its shape rather than getting rounded off along with the tremor.

A splash shape shown on left/right/middle clicks, and separately on scroll up/down. Shape and opacity are configurable, and can match the Halo's shape, plus an optional outer glow (one shared colour for every click type) fading outward from each ripple. This is purely visual — the text-label equivalent is Mouse strokes, below, and either can be shown alone. An optional audio click cue plays a short synthesised tone on every left/right/middle click (not scroll) with its own volume — independent of the ripple visuals, so it works with those turned off too.
A bright glowing dot with a short fading trail for precisely pointing at something on screen. Configurable size, opacity, and colour.
Replaces the Windows cursor with one of 6 shapes — Arrow, Dot, Ring, Cross, Diamond, Star — at a configurable size and colour.
A small badge that always follows the cursor, showing its live screen coordinates ("X: 1234 Y: 567") — handy for pixel-precise tutorials (CSS layout, design tools, "click exactly here" instructions). Unlike every other popup tool it has no configurable placement: it always tracks the cursor 1:1, offset just far enough not to cover it, flipping to whichever side keeps it fully on screen near an edge. Configurable opacity and colour.
Shared "Move out of the way": for any tool pinned to a fixed spot on screen, enabling this jumps it to the opposite corner whenever the pointer gets close, so it never blocks what you're pointing at.
Dims the whole screen except a clear area kept around the pointer. Configurable radius and dimming strength, plus an optional frame colour/thickness around the clear area, and an optional outer glow (its own independent colour) fading outward from the frame.
Dims the whole screen except whichever window is currently focused, tracking live as you alt-tab or click a different window — including PointCue's own windows (Settings, About, Hotkeys, the countdown timer, ...), its own tray menu and Profiles submenu, and any right-click menu anywhere in Windows (Explorer, other apps, system tray icons like volume or network). Only the taskbar and desktop are skipped (clicking them briefly steals focus without really being "a window" worth highlighting), and a few modern flyout-style popups that aren't classic menus may not be detected — in either case the clear area simply stays wherever it last was until you focus a real window again.
Configurable padding around the window's edges, dimming strength, an optional frame (its own on/off checkbox, plus colour/thickness), and an optional outer glow with its own independent colour, fading outward from the frame.
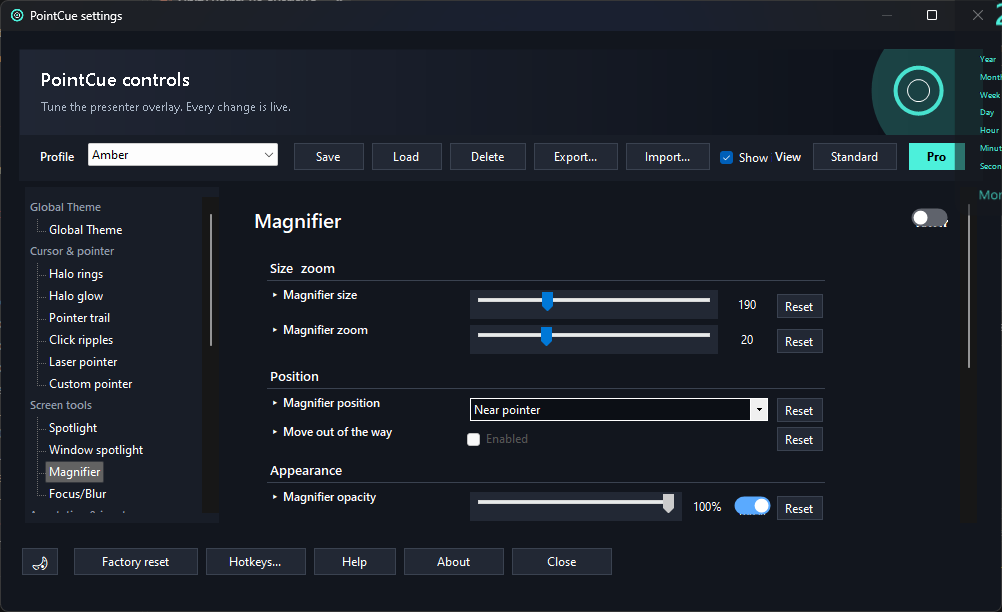
A zoom lens that follows the pointer (or pins to a fixed position). Configurable lens size, zoom level, border, shape, and opacity, plus an optional outer glow (its own independent colour) fading outward from the border ring. "Lock magnifier" freezes the magnified content in place even as you keep moving the cursor — handy for describing something while pointing elsewhere.
Like Spotlight, but blurs everything outside the clear area instead of dimming it, and draws no ring or frame around it. Two modes:
"Blur amount" controls how strong the blur itself looks; "Focus opacity" controls how strongly the blur is blended over the real screen; "Feathering" softens the edge between the sharp area and the blur (0 is a hard edge, higher values fade the transition over more pixels).
Blur effect picks the look of the blurred area itself: Blur and Gaussian Blur are softer/smoother versions of the same core blur; Motion Blur adds a directional smear on top; Colour Tint and Frosted Glass wash the blur with the Global Theme's colour or white respectively; Transparency skips blurring altogether and simply shows the sharp desktop through at reduced opacity. All but Transparency are the closest achievable approximation of the named effect rather than a literal reimplementation — there's no depth map or GPU shader behind them, just a fast, layered blur.
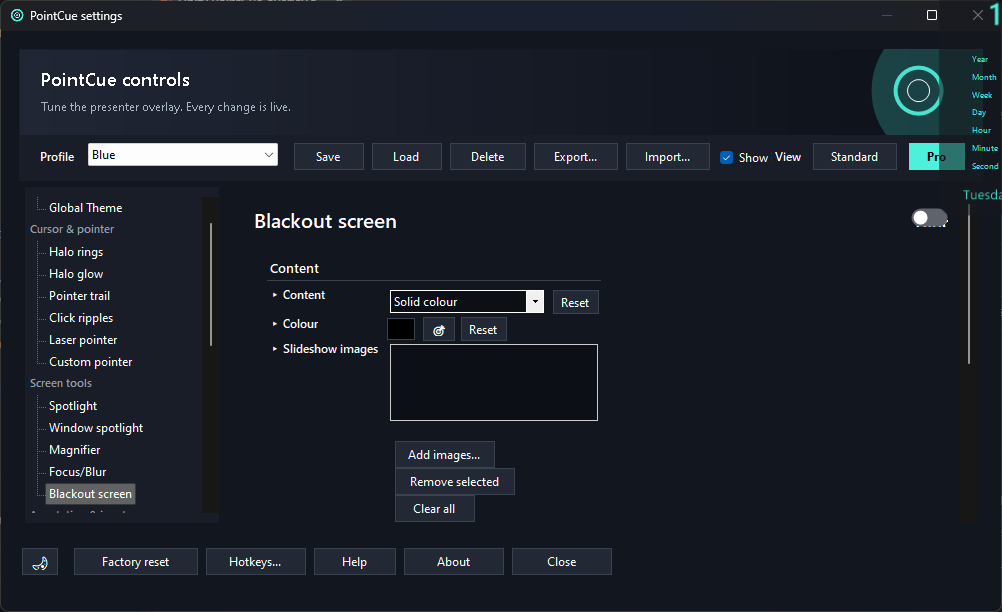
The classic "press B to black the screen" presenter move — instantly covers every monitor with an opaque overlay so the audience's attention snaps back to you instead of your desktop. Press its hotkey again, or Esc, to turn it back off — the same key that already cancels a screenshot area selection or exits Drawing mode, so there's one consistent "get me out of this" key regardless of which full-screen tool is active. Three content modes:
Image and Capabilities modes share a configurable slide duration and a transition between slides — the same 16-option Transition system used elsewhere in the app (Cross-fade, Slide, Zoom, Flip, Rotate, Iris, Blinds, Bounce, and more), with its own transition-speed slider. An optional frame bakes a plain rectangular border around the edge of the screen, with configurable thickness and colour (with the usual "Same as Global Theme" option). An optional Show clock switch keeps the Clock tool visible on top of the blackout using its own style and placement settings — handy for keeping track of time during a break without giving up the "screen's off" effect. Custom clock placement isn't supported here, so pick one of Clock's fixed positions if you want to use the two together.
Slide duration and transition speed run back-to-back rather than overlapping — each slide sits fully static on screen for the whole configured slide duration, then the transition to the next one plays for the whole configured transition speed, then the next slide's own static duration begins, and so on. Picking None swaps slides instantly with no animation, so transition speed has nothing to control in that case — the slider greys out and adds no extra time to the schedule.
An optional Show countdown timer switch starts a break countdown the instant Blackout turns on, using its own duration (typed in minutes) and message rather than the Countdown timer tool's regular default — handy for "back in 5 minutes" breaks without separately configuring and starting a timer every time. It reuses the Countdown timer tool's own badge and styling, and only ever affects the timer Blackout itself started: turning Blackout off (or letting its countdown run out) restores the Countdown timer tool's regular default duration and message afterwards, while a countdown timer you'd already started manually keeps running - and stays visible through the blackout - completely undisturbed. A further Auto-close when the break ends switch turns Blackout back off automatically the moment its own countdown reaches zero, for a fully hands-off "black the screen for exactly N minutes" break.
Shows typed keys on screen as they're pressed — great for tutorials so viewers can see exactly what you typed. Position (follow pointer or pin to a corner/edge), opacity, and border colour are all configurable, plus an optional outer glow (its own independent colour) fading outward from the popup. Holding a key down shows one popup for the whole hold rather than repeating.
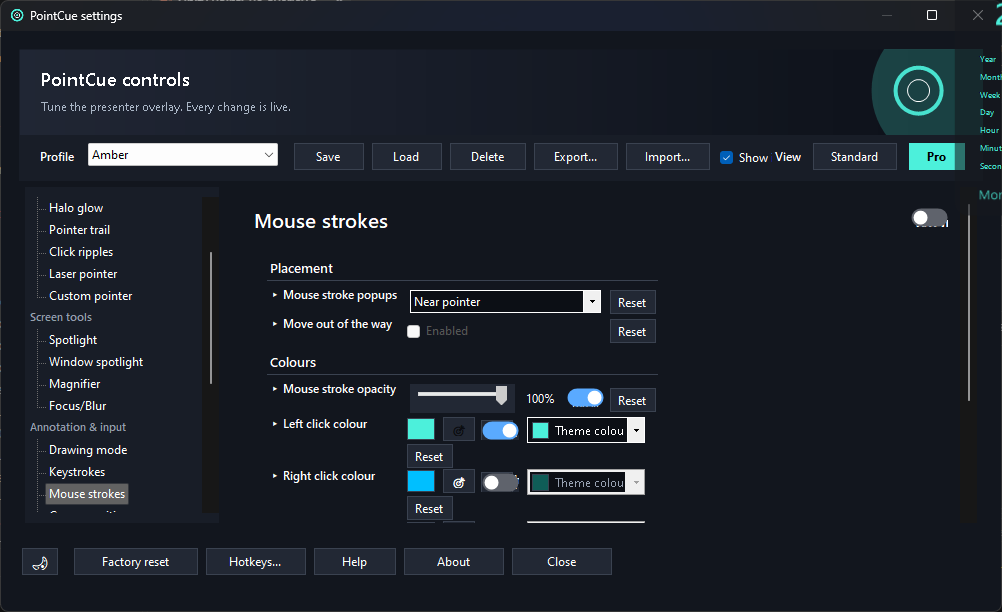
Shows "Left click" / "Scroll up" style wording on screen — the text-label counterpart to Click/Scroll ripples' splash shapes. Independent position, opacity, and border colour, plus an optional outer glow (one shared colour for every click/scroll variant) fading outward from each popup; can be shown with or without the ripple shapes.
Ctrl+Alt+D toggles Drawing mode, which lets you draw directly over whatever is on screen — ideal for annotating during a live demo or recording. While active, a small help bubble shows the exit shortcut and key shape reminders; press F1 at any time to show or hide the full on-screen key list. An optional outer glow can be turned on in Settings > Drawing mode — it uses each stroke's own colour rather than a separate setting, so it never fights whatever colour you actually drew with.

An optional small floating icon palette can appear alongside Drawing mode — one icon per shape tool (Freehand, Line, Rectangle, Circle/Oval, Arrow, Polygon, Highlighter, Marker, Move). It's off by default: turn on "Drawing toolbar" in Settings > Drawing mode to have it appear automatically every time you enter Drawing mode, or leave it off and press Ctrl+Alt+Shift+D to show or hide it just for the current session, regardless of that setting. Click an icon to make that tool the active default: it stays selected until you click it again (back to Freehand) or pick another tool, so you don't need to hold a key for every single stroke. Holding a different tool's key still works as a one-off override without disturbing what's selected on the toolbar.
Hold one of these keys while dragging to draw that shape instead of a freehand line. Every key is configurable in Settings > Drawing mode, and PointCue will not let two tools share the same key.
| Key | Shape | Notes |
|---|---|---|
| C | Circle / oval | hold Shift for a filled version |
| L | Straight line | — |
| R | Rectangle | Shift for filled, Ctrl for rounded corners (or both) |
| A | Arrow | Shift for double-headed |
| P | Polygon | hold and click each corner to add a vertex; release the key, press Enter, right-click, or click back on the first corner to close |
| H | Highlighter | thick, translucent stroke for emphasis |
| N | Numbered marker | click to stamp a numbered marker for step-by-step walkthroughs |
| T | Text | click to open a popup, type an annotation, and place it — with an option to frame it |
| M | Move | hold and drag an existing shape to reposition it |
Numbered markers are great for "step 1, step 2, step 3" style walkthroughs. Three settings control their appearance:
Click with the Text tool to open a small popup: type your annotation, optionally check "Show frame around text" for a solid background/border behind it, then click Place (or press Ctrl+Enter) to drop it at the point you clicked. Framed text is easiest to read over busy backgrounds; unframed text relies on its outline colour for legibility.
Font, size, and style (Regular/Bold/Italic/Bold Italic) are set once in Settings > Drawing mode, along with 3 independent colours - the text itself, its outline, and the frame border - each with its own "Same as Global Theme" option. All of it applies to every placed text annotation - a live "ABC abc 123" preview (shown both unframed and framed) shows exactly what you'll get before you place anything.
While in Drawing mode, press B (configurable) to cycle the canvas background through three states:
Both colours are fully configurable via a colour picker or by picking a colour straight off your screen. The same drawing tools, shapes, and markers work identically on top of any background. The background always resets back to Desktop the next time you turn Drawing mode off, so you never accidentally leave a solid colour covering your screen.
Ctrl+Alt+J (or the tray menu's "Save screenshot") saves a screenshot — including any drawings currently on screen — and works whether or not Drawing mode is active.
PointCue_Screenshot_2026_03_05_14_30_05.png — never overwriting an existing file (a numeric suffix is only ever added for the rare case of two saves landing in the same second).All of this is configured under Settings > Capture > Screenshots.

Ctrl+Alt+V (or the tray menu's "Screen recording" toggle) starts or stops recording the screen to an MP4 file, encoded with Windows' own H.264/AAC encoder — no extra software required.
PointCue_Recording_2026_03_05_14_30_05.mp4, and so on), saved by default to a "PointCue Recordings" folder inside Videos. An Open button next to the folder path opens it directly in File Explorer, creating it first if it doesn't exist yet.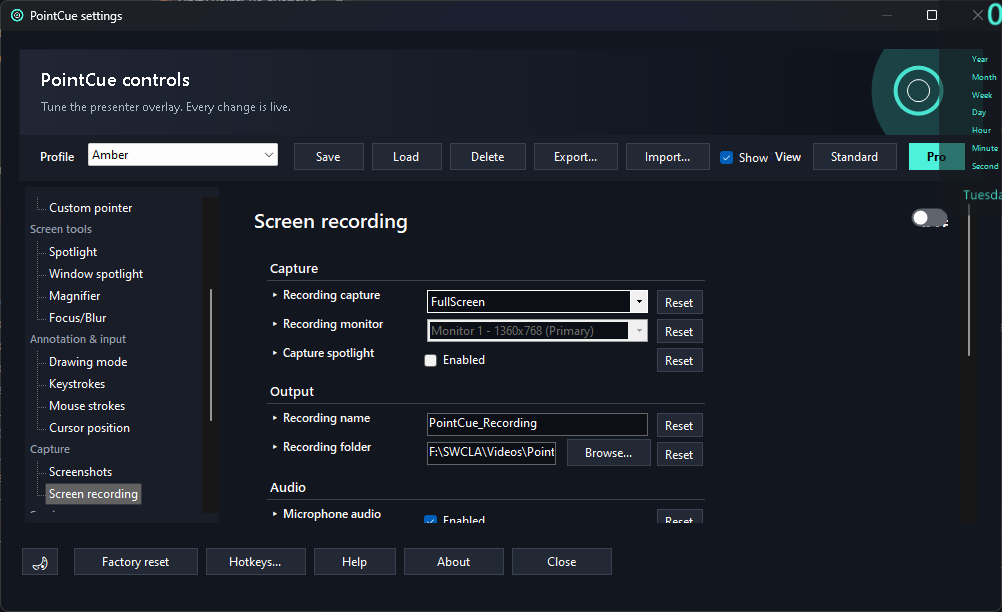
All of this is configured under Settings > Capture > Screen recording.
Ctrl+Alt+Shift+V (or the tray menu's "Voice recorder" toggle) starts or stops a standalone audio-only recording, independent of Screen recording — use it on its own to capture narration, a call, or a quick voice memo without a video file alongside it. Saves straight to an AAC .m4a file, the same format and OS encoder Windows' own Voice Recorder app uses.
PointCue_Voice_2026_03_05_14_30_05.m4a, and so on), saved by default to a "PointCue Voice Recordings" folder inside Music. An Open button next to the folder path opens it directly in File Explorer, creating it first if it doesn't exist yet.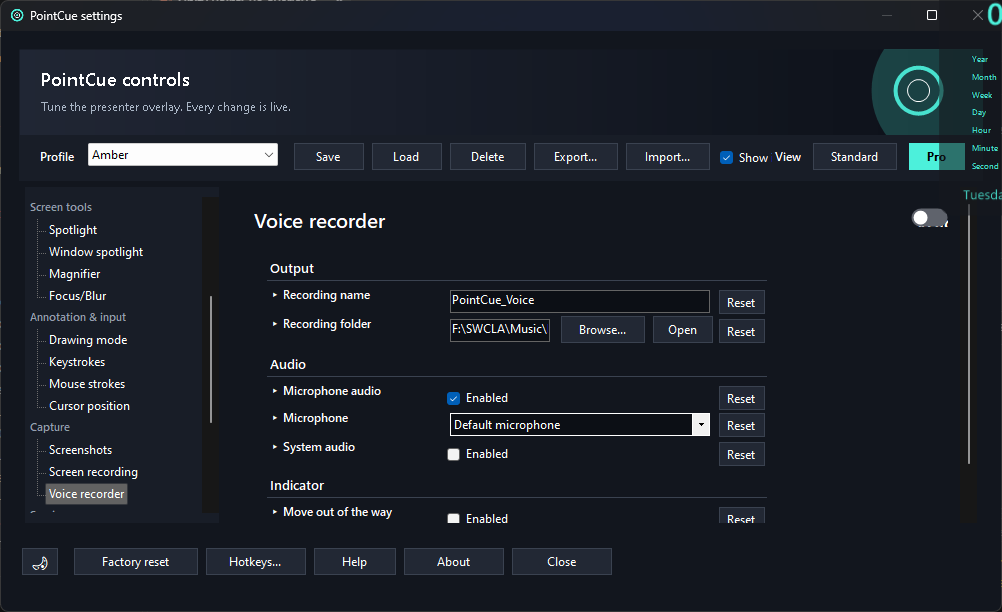
All of this is configured under Settings > Capture > Voice recorder. Free tool.
A small on-screen badge showing your live microphone input level, independent of Voice recorder or Screen recording — turn it on just to keep an eye on mic level (checking it before a call, watching for clipping, confirming you're not muted) without recording anything to a file. A live level meter (green through amber to red as it approaches clipping) fills in real time from the raw peak of the selected microphone's captured audio, the same style as Voice recorder's own meter. Configurable microphone device, placement (follow the pointer or pin to a fixed spot, with "move out of the way" support), and opacity. All of this is configured under Settings > Annotation & input > Mic meter. Free tool.
A small on-screen panel with two live, draggable sliders — Mic and Speaker — covering only your current default (active) input and output devices, not a full per-app mixer. Drag either slider to set that device's system volume live; click its icon to mute/unmute. Two shortcut buttons open Windows' own fuller controls: Mixer launches the classic per-app volume mixer, and Sound settings opens the Sound control panel's device list for full device management. Automatically follows along if you switch your active mic or speaker mid-session, rather than pinning to a specific device. Its slider colour matches the shared Global Theme accent. Configurable placement (follow the pointer or pin to a fixed spot, with "move out of the way" support) and opacity. All of this is configured under Settings > Annotation & input > Volume mixer. Free tool.
A countdown overlay for workshops, training sessions, and scheduled breaks — shows a message like "Back in 5:00" that counts down. Formerly called "Break timer"; the separate "Countdown card" tool that used to sit alongside it was a near-duplicate and has been folded into this one. Configurable default message, duration, on-screen position, opacity, border colour, text colour, and text size, plus an optional outer glow (its own independent colour) fading outward from the timer.
The message is shown as "<message> <time>" — there's no automatic "in" inserted between them, so include your own connector word ("in", "until", whatever reads best) as part of the message itself; the default is "Back in", producing "Back in 4:32".
The countdown badge shares the same formatting options as the Clock: the background plate and border can each be shown/hidden and given their own opacity independent of the overall timer opacity, a "Background effect" (the same 6 options Clock's background gets — Solid, Glass, Emboss, Gradient, Vignette, Striped) picks how the plate renders, frame thickness matches the rest of the app by default or can be set independently, and an optional text outline (adjustable from 0.5% to 20% of the text size, drawn entirely outside the text) adds a stroke around the countdown text for legibility.
An optional progress bar along the bottom of the badge fills as the countdown elapses, with its own independent colour (and the usual "Same as Global Theme" option) — on by default. The countdown digits animate using a "Transition" setting that matches Global Theme by default (same as Clock and Stopwatch), with its own "Match Global Theme" toggle to give the countdown timer an independent transition instead. Start it from the tray menu's dialog (which lets you set a custom duration and message each time), its own Settings page switch for a quick on/off using the saved defaults, or the shortcut to reuse the last settings; pause and resume from the same tray menu item.
A count-up overlay for timing talks or demos — shows a message like "Elapsed 4:17" that counts up, switching to hours:minutes:seconds once it's run an hour or more. Configurable default label, on-screen position, opacity, border colour, text colour, and text size, plus an optional outer glow (its own independent colour) fading outward from the badge.
Shares the exact same formatting options as Countdown timer and Clock: the background plate and border can each be shown/hidden and given their own opacity independent of the overall badge opacity, the same "Background effect" picker, frame thickness that matches the rest of the app by default or can be set independently, and an optional text outline (adjustable from 0.5% to 20% of the text size, drawn entirely outside the text). The elapsed time animates using a "Transition" setting that matches Global Theme by default (same as Countdown timer and Clock), with its own "Match Global Theme" toggle to give the stopwatch an independent transition instead.
Start/stop, pause/resume, and reset are all available from the tray menu or their own shortcuts — reset zeroes the elapsed time without stopping or hiding the badge, so a running stopwatch keeps counting from 0 and a paused one stays paused at 0. Unlike Countdown timer and Webcam, this is a free tool.
A picture-in-picture camera bubble. Choose the capture device, bubble size, position (including a draggable Custom position), border, shape, and opacity, plus an optional outer glow (its own independent colour) fading outward from the ring. Can be moved out of the way automatically when the pointer gets close, just like other fixed-position tools.
A resizable, chrome-free floating window for showing images, videos, PDFs, text/RTF files, and web pages — one playlist item at a time — during a demo or lesson. Manage the playlist (add local files or a web page URL, reorder, remove, save/load a .pointcue-playlist file) under Settings > Session > Media display. A YouTube URL (watch page, youtu.be link, Shorts, or an embed link) is automatically shown as a clean embedded player — no header, sidebar, comments, or recommendations.
On-screen controls — Move, Previous, Play/Pause, Next, a position counter, an Auto-repeat toggle, and Maximize/Restore, plus a PDF page-navigation row when showing a PDF — sit in a bar along the bottom that fades in only while the pointer is over the window; a web page's own scrollbars fade the same way. Keyboard shortcuts: Left/Right arrow (previous/next), Space (play/pause a video, or pause/resume an image slideshow), Page Up/Page Down (PDF pages), and Esc (close — or restore first, if maximized).
Maximize fills the current monitor's working area (leaving the taskbar reachable, since this window has no taskbar entry of its own); click again, or press Esc, to restore back to its previous size and position — moving and resizing are disabled while maximized, and the content frame stays exactly as configured at any size. Supports the same named-placement system as Webcam/Clock, plus Custom free-dragging (enables the on-screen Move handle), an optional content frame (corner radius, thickness, and colour), always-on-top, and auto-advance/auto-repeat for image slideshows — videos always advance at the end regardless of the auto-advance setting. Free tool.
Shows the current time on screen — the system clock, or a fixed timezone regardless of where the PC itself is set. Seven display styles:
A "Show date" switch controls an optional centred date line beneath the main readout, for every style, and a "Date above time" switch flips it to sit above the readout instead. The time format is a standard .NET date/time format string you can edit directly, with presets like h:mm:ss tt, HH:mm:ss, and yyyy-MM-dd HH:mm to start from.
Configurable text/face size, position, opacity, border colour (the outline/face-ring only), and text colour (the digits on Digital/Rich text/Flip/Counter/Progress ring/Progress bars, and the date line under any style — defaults to following Global Theme's main colour, with the usual "Same as Global Theme" option to switch to an independent colour instead). An optional text outline (its own independent colour and thickness adjustable from 0.5% to 20% of the text size, off by default, drawn entirely outside the text rather than straddling its edge - including around Counter's 7-segment digits) adds a stroke around the digits/text and date line, for legibility when the text colour is too close to whatever's showing through behind the clock. Plus an outer glow.
The background plate/face and the border/face-ring can each be shown or hidden and given their own opacity, independent of the overall clock opacity. A separate "Background effect" picks how the plate itself renders, independent of style — Solid (a flat filled plate), Glass (a translucent frosted panel with a soft highlight), Emboss (no fill at all: a carved, transparent relief rim around the plate's outline, and for Digital/Rich text the text itself is carved the same way), Gradient (a diagonal blend from a lighter to a darker tint of the same background colour), Vignette (a radial blend, brighter at the centre and darker toward the edge), or Striped (a soft diagonal hatch texture over the flat fill) — shared with Countdown timer, so every option here is available there too. The border's frame thickness matches the rest of the app by default (Global Theme's frame thickness), or can be set independently.
On Digital, Rich text, Flip, and Counter, every digit renders in a fixed-width slot and the whole readout is centred, so it doesn't nudge sideways as digits tick between narrow and wide shapes (e.g. "1" to "8") and the clock's own outer frame stays a constant size second to second, rather than subtly resizing as the current digits happen to measure slightly narrower or wider than a moment ago. Digit changes animate using a "Transition" setting that matches Global Theme by default (same as Countdown timer and Stopwatch), with its own "Match Global Theme" toggle to give the clock an independent transition instead — only the character that actually changed animates, not the whole clock; Analogue always sweeps its hands continuously since it has no discrete digits to transition. Like Webcam, it supports a draggable "Custom" position - drag it by its content to place it anywhere on screen.
Profiles let you save different complete settings setups — for example one for teaching, one for demos, and one for screen recordings — and switch between them from the tray menu.
.pointcue file, so it can be backed up or shared with someone else..pointcue file back in.Under Settings > General > Startup, "Run at Windows login" launches PointCue automatically when you sign in. This is a single on/off switch for the whole install (via the standard Windows Run registry entry) rather than something saved per profile.
Ctrl+Alt+I (or the tray menu's "Desktop icons hidden" toggle) instantly hides or reveals the icons on the Windows desktop itself — not any PointCue overlay — useful for tidying your screen right before sharing it. This is independent of every profile and every other setting.
Ctrl+Alt+N (or the tray menu's "Taskbar hidden" toggle) does the same for the entire Windows taskbar — Start button, pinned/running app icons, system tray, and clock — on every monitor. There's no way to hide only the pinned icons while leaving the rest of the bar visible, so this hides the whole thing.
Several tools — Halo rings, Spotlight, Window spotlight, Magnifier, Click ripples, Keystrokes, Countdown timer, Stopwatch, Mouse strokes, Drawing mode, Webcam, and Clock — have their own optional outer glow, each with its own on/off switch and independent colour, configurable on that tool's own settings page.
Manage tools (Settings > General > Manage tools) lists every core tool with a "Shown" switch, on by default. Turning one off makes it disappear completely rather than just tidying up a menu: its tray entry, its floating quick-toggle toolbar entry, its own Settings page, its row in the Hotkeys editor and the Hotkey cheat-sheet, and its keyboard shortcut (which simply stops responding) all go at once - and if it happened to be switched on, it's switched off in that same step. A shared tray submenu (Audio, Capture, Timers) disappears too once every tool inside it has been hidden this way, and the Drawing submenu disappears the moment Drawing mode itself is hidden. Turning a tool back on restores it everywhere, and Factory reset brings everything back.
The tray icon menu lists every tool as a checkable toggle, grouped with dividers - Cursor & pointer, then Screen tools - followed by a "Drawing" submenu (Drawing mode, Undo last drawing, Clear drawings), Keystrokes, Mouse strokes, Cursor position, an "Audio" submenu (Mic meter, Volume mixer), a "Capture" submenu (Save screenshot, and Screen recording's and Voice recorder's own start/pause actions), a "Timers" submenu (Countdown timer and Stopwatch's start/stop, pause/resume, and reset actions), Clock, Webcam, Media display, a "Workspace" submenu (desktop icons/taskbar/toolbar visibility plus "Pin active window on top" - none of the four have a Settings page of their own, so this was already just a loosely-related cluster kept together by convention), Quick help, Profiles, Settings, a "Hotkeys" submenu (Edit hotkeys..., plus the Hotkey cheat-sheet toggle), and Exit - each submenu grouped so the main menu stays short enough to fit on screen. Any tool hidden via Manage tools (above) is skipped entirely when this menu is built, and a submenu left with nothing shown inside it disappears too.
The floating quick-toggle toolbar (below) mirrors the same grouping with its own divider lines. A currently-active (checked) tool's row also gets a slight background tint across its full width, alongside the existing ring around its icon and underlined label, so active tools stand out at a glance in a long menu.
Shift+click any tray menu item for a tool with its own Settings page to jump straight there instead of toggling that tool - a quicker way in than opening Settings and navigating the tree by hand. Items with no settings page of their own (drawing actions, workspace decluttering toggles, Pause/Resume actions, Profiles, and the rest of the menu below it) don't respond to this.
Left-clicking the tray icon instantly hides every currently-enabled visual pointer aid in one action — Halo rings, Halo glow, Spotlight, Pointer trail, Click ripples, Scroll ripples, Keystrokes, Mouse strokes, Magnifier, Laser pointer, Webcam, and Custom pointer. Left-click again to bring back exactly the ones that were on before. This deliberately does not affect Drawing mode, the Countdown timer, or an in-progress screen or voice recording, since those are things you're actively using rather than passive visual aids you'd want to sweep away in one click.
The tray icon itself dims slightly whenever every visual aid above is off, so you can tell PointCue's status at a glance without opening the menu.
Ctrl+Alt+E (or the tray menu's "Toolbar" toggle) opens a small floating panel with the same checkable tools as the tray menu, shown as toggle switches instead of a menu list — a way to flip tools on and off without opening the tray menu each time. Drag its top bar to move it anywhere on screen, click its gear icon to jump straight to Settings (also Ctrl+Alt+Shift+S from anywhere), and click its × to hide it again; both its position and whether it's shown are remembered the next time PointCue starts. Like the pause-all shortcut, it only covers on/off tools — not action items like Screen recording or the Countdown timer.
| Question | Answer |
|---|---|
| Where are my screenshots/recordings saved? | Settings > Capture shows and lets you change both folders. Defaults are a "PointCue Screenshots" folder in Pictures, and a "PointCue Recordings" folder in Videos. |
| How do I change a shortcut? | Tray menu > Hotkeys. Every shortcut needs at least one modifier key, and two actions can't share the same combination. |
| Nothing happens when I hold a shortcut down | Shortcuts are designed to fire once per press, not repeatedly while held — press and release rather than holding it down. |
| I want to reset everything | Settings > Factory reset restores all defaults. Consider exporting your current profile first if you might want it back. |
| Can I use different setups for different sessions? | Yes — see Profiles, above. |